WEB BUTTONS HOW TO'S
 How To's
 Settimeout Rollover Menu
- Creating Collapsible Menus In Javascript
- Javascript Cross Frame Menu
- How To Create Submenus In Javascript
- Mouse Over Image Drop Down Menu
- Coldfusion Collapsible Menu
- Css Menu Cross Frame
- Create Menu Submenu Using Javascript
- Collapsing Menu Bar
- Javascript Menubar
- Create Sub Menus Using Javascript
- Menu Lateral Desplegable Css
- Three Layer Collapsible Menu
- Css Html Collapsible Menu Example
- Html Create Drop Down Menu
- Expandable Submenu
 Features
 Online Help
  FAQ
FAQ


QUICK HELP
CREATE A MENU WITH HTML
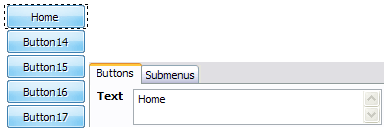
Then select next web button with click. Enter its text and so on. After finishing, the menu will look like this: 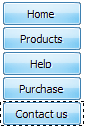

"Open" dialog will appear, where you can choose an icon. Other way to assign an icon is to type its full path and name in the "Icon" field ("c:\myicons\stylish_3\pretty.ico", for example). Repeat this for each menu button. You should get something like this in result: 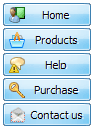

You will see that icons are aligned in the selected way now. In this example we choose Top icon align. 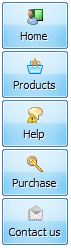
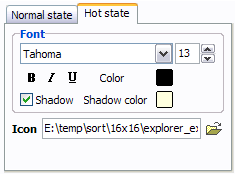
Now, when you point mouse at the menu button, shadow will appear under the button text like in the "Products" button of the following example: 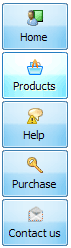
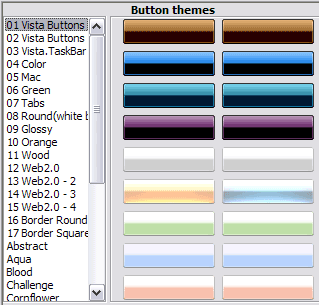
When you find a button background you like, double-click it to apply. For example, after choosing one of the "01 Vista Buttons" theme's backgrounds, we'll get following results:
DESCRIPTION
Good menu is an essential part of website commercial success. If people can't find their way around the site, they will fast give up seeking and retire, never to return. So, it's extreme serious that your website has a accurate, precise, prompt, and navigation of
Don't let your web site guests to get lost. Try Drop Down HTML Menu!
Vista-style menus Code For Menu List And Submenus Web menus, which are created by DHTML Dropdown Menu, exactly correspond with Windows Vista graphic interface components. That is why the visitors of your site will not have to spend their time in order to familiarize with the unusually-looking navigation. Nevertheless, you are not limited by the standard Windows themes, and you will be able to create your own original buttons. Cost Effective Css Horizontal Menu With Pictures
Editing Xp Themes Create A Menu With Html Fully Customizable
RELATED
MENU SAMPLES
Vista Style 6 - Buttons GraphicsTabs Style 5 - Web Page Buttons
Dhtml Fold Out Menu Tabs Style 4 - Icons Buttons
XP Style Olive - Image Button
Vista Style 10 - Button Graphics
Tabs Style 2 - Web Buttons
Tabs Style 6 - Buttons Design
Javascript Double Click Menu
Tabs Style 8 - Web Site Graphics